Planting a tree is a good investment in a landscape. With proper care, it will make a major impact upon a landscape and may well outlive you. One facet of proper tree care is stabilizing the tree, when necessary, after you first plant it so that it does not grow crooked. This is accomplished by “tree staking.” Yes, it is possible to stake a leaning tree after the fact to straighten it out, but it is better policy to be proactive. There is more than one way to stake a newly planted tree. Some use one tree stake, others two, still others three. Staking materials used also vary. Stakes can be wooden or metal. Ties also come in different materials, whether they are homemade or store-bought. We will take a close look at one possible way to stake a tree.
When to Stake a Tree
When is it necessary to stake a new tree? It’s really a question of the stability provided by the site you’ve selected for the tree. Is the site on a slope? Is the site exposed to high winds? Is the soil on the site overly wet or sandy? All of these circumstances can cause instability and warrant staking the tree to stabilize it.
Before Getting Started
You can do more harm than good in staking a tree if you choose the wrong materials. Special tree straps are available at home improvement stores to do the tying for the job. It is possible to bypass these in the DIY spirit and make your own, but first, understand the concept behind the special straps so that your homemade ties replicate the functionality of the store-bought version.
The key quality of the special straps is that they are soft. The bark of a young tree’s trunk is more sensitive than you might think. You can’t let bare wire, cables, or rope come into direct contact with the bark. Doing so can cause wounds that offer an open invitation to diseases and pests. The ideal is a material that is wide and flexible. So if you are going to improvise, possibilities include a cloth strip, pantyhose, and rubber tubing (for example, an inner tube from a tire). Some people thread twine through a rubber hosing (for example, a section of the kind of rubber tubing used to build garden fountains) and wrap the hosing around the tree trunk.
What You’ll Need
Equipment / Tools
Materials
- 2 Pieces of wire
- 2 8-foot U posts
- 2 Tree straps
Materials
Tools
- 1 Small sledgehammer
- 1 Can of orange spray paint
Instructions
-
Mark the Perimeter of the Rootball
Determine where the rootball of your tree is, so that you can drive the stakes around it rather than into it (which could cause damage). This will be easy to do if you are staking the tree immediately after planting it. Otherwise, you may have to probe gingerly around the tree to determine the rootball’s location. Once you know where the rootball lies, mark its perimeter with orange spray paint.
-
Drive the Stakes Into the Ground
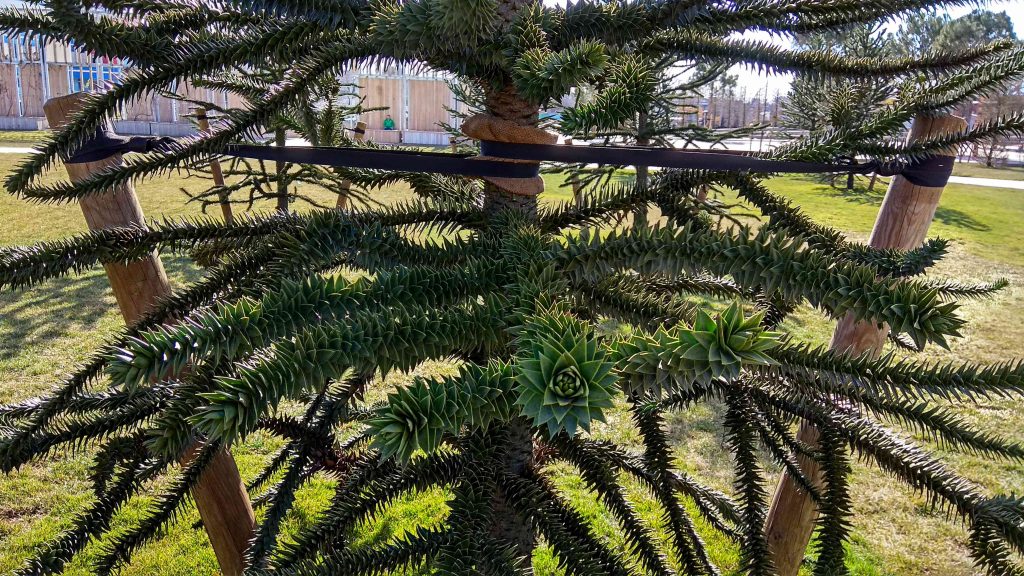
Using a small sledgehammer, drive each of the two U posts into the ground, one directly across from the other, using the line you just spray-painted as your guide. Drive the stakes down at least 18 inches (even deeper if the soil is loose), but don’t drive them unnecessarily deep because you must remove them later.
-
Locate the Right Spot for the Tie on the Trunk
Finding the right spot along the trunk to attach the straps is tricky. The straps must be low enough to allow the tree’s canopy to sway but also high enough so the trunk, too can sway slightly. The exact positioning will vary because tree height varies. The best position is often near the first lateral branches extending out from the trunk.
-
Tie the Tree to the Stakes
Wrap one of the tree straps around the tree at the position just chosen. The tree straps we are using have holes at each end. While gently pulling the tree toward you with the strap, thread a piece of wire through these holes. While still pulling gently, tie off the wire on the U post, making use of one of the holes on the latter. Don’t pull too tightly: The straps must have a little slack to allow the trunk some movement. The wire should run roughly parallel to the ground between the tree and stake. Repeat on the opposite side, wrapping the other strap around the trunk slightly above or below the existing strap, threading wire through its holes, and tying it off at the other U post.
When to Remove the Staking
Tree staking is not forever. The idea is to give a young tree a good start, then let it stand on its own after it has developed a strong enough root system to stabilize itself. A young tree requires one growing season to put down strong roots. If you planted and staked the tree in spring, remove the staking in autumn.
Read the full article here


