Glass repair around your home is not always as difficult as it may seem. Cracked glass is often a fact of life when picture frames, mirrors, kitchen glassware, or door glass meets hard objects. Short cracks can rapidly develop into long ones that spell the end of the entire glass item. But you can quickly and inexpensively repair that glass and stay ahead of complete replacement with epoxy and a utility knife blade.
Warning
The methods discussed do not work for windshields or other automotive glass.
Glass Repair With Two-Part Epoxy
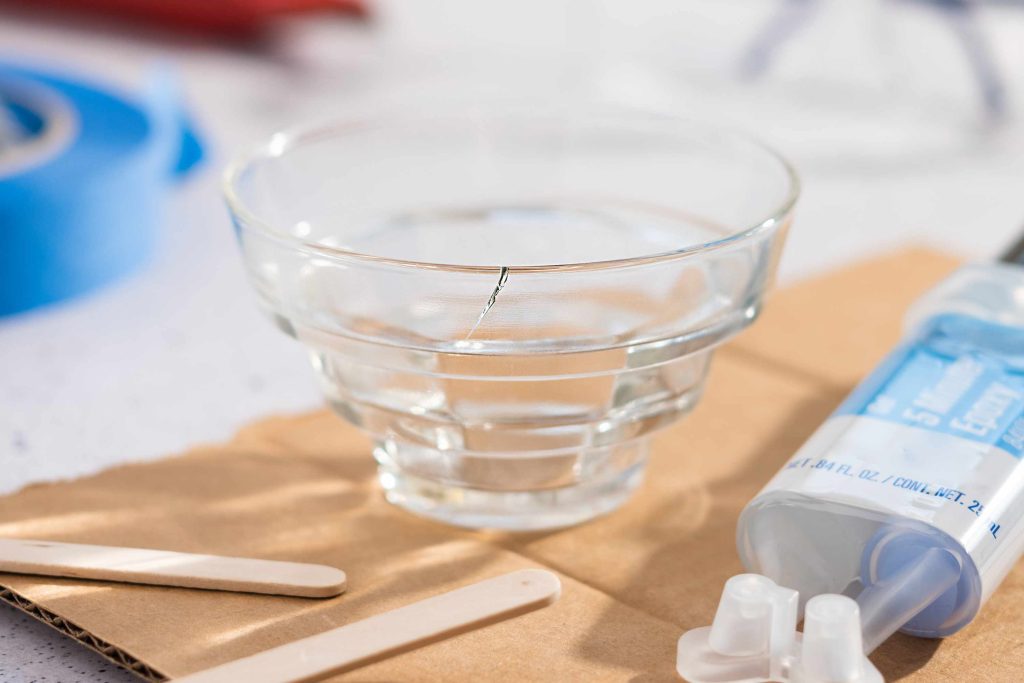
Two-part epoxy consists of a resin and a hardener. Neither will work on its own. You’ll need to squirt out the two substances and mix them together. For small repairs, it’s best to buy epoxy in a double-cylinder syringe. This syringe regulates the flow of resin and hardener so that they remain within the correct proportion.
Whether gluing the glass in place or working with separate pieces of glass, you won’t have to worry about excess epoxy. You’ll leave the excess in place and let it fully cure. Once the epoxy has hardened, you will slice it off with a razor blade or utility knife blade.
Types of Cracked Glass That Can be Repaired
-
Single-pane glass
-
Mirrors
-
Glass tiles
-
Sidelites
-
Picture glass
-
Some kitchen glassware
-
Double-pane windows
-
Microwave doors
-
Oven doors
-
Shower or tub glass
-
Automotive glass
Picture glass, door glass or door sidelites, single-pane windows, mirrors, and glass tile can be repaired with the two-part epoxy method. Kitchen glassware that will not be heated can often be repaired too.
Round impact cracks tend to repair best if they are no more than 1 inch in diameter. Long cracks should be no more than 12 inches. Glass repair will only work on single-pane glass.
Do not repair microwave door glass, double-pane windows, shower or tub door glass, or automotive glass with this method.
Cracked phone or tablet glass can be temporarily repaired with epoxy and the break will still be quite visible. It is highly advised to take any device with a cracked screen to be expertly fixed. A DIY fix with epoxy will only prevent the glass from falling out and will stop a crack from lengthening until you can get it to a service to fix it. Plus, it will smooth over the crack and reduce sharp ridges keeping you safe while you are transporting the device.
What You’ll Need
Equipment / Tools
- Utility knife blade
- Nitrile gloves
- Wooden craft stick
- Safety glasses
- Clamps for glass (optional)
Materials
- Cardboard (optional)
- Two-part epoxy for glass
- Painter’s tape
- Glass cleaner
- Paper towels
Instructions
-
Prepare the Work Area
Lay clean cardboard on the work area. Work in a well-ventilated room. Because you have only about five minutes of working time with epoxy, make sure that you have all of your tools nearby. All tools that you use should be disposable: work surface, gloves, and mixing stick.
-
Clean and Dry the Glass
The glass must be clean and free of residue for the glue to stick. Separating the broken pieces of glass and cleaning the edges is preferable, if possible. Otherwise, leave the broken pieces together. Let the glass thoroughly dry.
Warning
Handle the glass with care if you decide to separate the pieces for cleaning. Always wear safety glasses.
-
Prepare the Epoxy
Snap off or cut off the ends of both of the two-part epoxy cylinders. Make sure that both cylinder nozzles are equally open. Squirt the epoxy on a clean working surface such as a paper plate, making sure that both liquids are extruding equally. Thoroughly mix the epoxy with the wooden stick.
-
Add the Epoxy to the Crack
Glass That Is Separated
If the two pieces of glass are separate, use the wooden stick to daub a small amount of epoxy along the broken edge of one of the pieces. Firmly hold the two pieces of glass together by hand as you add strips of painter’s tape to the surface.
Glass That Is Together
If the pieces are together, gently force the epoxy into the crack with the stick, as if buttering bread. It is okay to leave a low hump of epoxy since it aids in the cutting process.
-
Let the Epoxy Dry
Let the epoxy dry, or cure, per the directions of the product you use. It can take anywhere from minutes to a day or two for the epoxy to fully cure. Depending on what you are repairing and the angle of the break, you may need to clamp the glass pieces during the curing phase using lightweight clamps designed to hold fragile materials.
-
Slice Off Excess Epoxy
Once the epoxy has fully cured. slice off the excess with a loose utility knife blade or razor blade. Slide the blade at a low angle (about 15 degrees) to slice off the epoxy. Slide the blade away from your body. As long as the blade remains flush with the surface of the glass, the epoxy will remain at that level, too.
-
Clean the Glass
Use paper towels and glass cleaner to clean fingerprints off of the glass and patch.
When to Call a Professional
A repair person will likely repair the glass with two-part epoxy, too. But with experience, they can likely repair the glass and make it less noticeable (though still not invisible). For sentimental or important items, it’s probably best to have a professional repair the glass for you.
-
Will the repair to the glass be visible?
Yes. The aim of do-it-yourself glass crack repair is to minimize the appearance of the crack and to contain the crack and prevent it from spreading.
Glass repair will not make the crack completely invisible from all angles. Rather, it is a cosmetic touch-up that only minimizes the visual appearance of the crack. When viewed from certain angles, the repaired crack may not be visible. From other angles, the crack will be visible.
-
Can windshield glass be repaired?
Windshield repair is not a do-it-yourself project. But professionals can repair windshields. Similar to the procedure described in this guide, a resin is injected into the crack to prevent it from spreading. It may be illegal to drive with a cracked windshield in your area. So, your insurance company can either repair the windshield or replace it entirely.
-
Can you make a crack in glass disappear?
No, but you can minimize the repair’s visibility. Transferring dirt or smudges onto the glass or mirror will make the patch visible. Dirt embedded in the epoxy stays on the glass. So, cleaning the glass is vital. Also, any remaining particles of epoxy will be visible. Make sure that you use a fresh razor blade or utility knife blade and remove all of the epoxy.
Read the full article here

