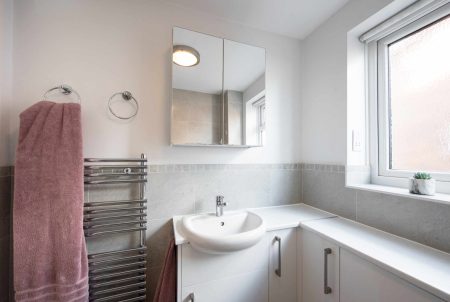
One of the most dramatic changes you can make in a bathroom is also one of the easiest projects for a DIYer. Replacing a vanity cabinet, countertop, sink, and faucet can amount to a major bathroom upgrade even if no other elements are changed. Today’s vanities often are sold along with matching counter surfaces with integrated sinks in a variety of materials and many are surprisingly affordable.
Before installing a new vanity, though, you will need to remove the old vanity cabinet, a process that also involves disconnecting the faucet water supply lines and drain assembly. But the project is easy if you take it one step at a time.
Before You Begin
In rare instances, a bathroom vanity may be built in place or installed before the other fixtures so that removing the cabinet intact is difficult or impossible. In these cases, you may need to cut the cabinet into sections in order to remove it. A reciprocating saw with demolition blade makes easy work of this task. Where this becomes necessary, it’s best to separate the sink and countertop from the vanity before cutting the vanity cabinet into pieces.
As you’re working, pay attention to the condition of the shut-off valves, p-trap, and supply lines (as well as other plumbing) servicing the sink and drain. These parts can lose their efficacy over time, so now might be a good time to replace them, while the vanity is gone.
Watch Now: How to Remove a Bathroom Vanity Cabinet
What You’ll Need
Equipment / Tools
- Bucket
- Adjustable wrench
- Channel-lock pliers
- Rag
- Screw gun
- Utility knife
- Flat pry bar
- Putty knife
Materials
- Wood block
- Rag
Instructions
-
Shut off the Water Supply
Since the cabinet is being removed anyway, it’s best to remove the vanity doors from their hinges, which will give you better access to the plumbing and make the cabinet lighter when you move it out of the bathroom.
Turn off the water supply to the hot and cold taps of the faucet. Normally, this can be done by closing the fixture shutoff valves, which connect the hot and cold supply tubes to the branch line stub-outs located beneath the sink. Turn each valve fully clockwise to close the valves.
If your vanity faucet does not have shutoff valves, or if they don’t work properly and fail to shut off the water, you will need to find the shutoff valve for the home’s main water supply and shut off the water there.
Once the water is shut off, open the faucet fully to release any pressure and let the water drain out.
-
Disconnect the Water Supply Tubes
Disconnect the water supply tubes between the shutoff valves and the faucet, working on one tube at a time. Place a bucket under the shutoff valve to catch water from the line.
Loosen the compression nut (or hose connector) on the supply tube with an adjustable wrench, turning the nut counterclockwise off the threaded nipple. Slip the supply tube off of the valve. With a compression connection (common with copper or brass supply tubes) there will be a small copper compression sleeve or ring on the tube under the compression nut.
Inspect the shutoff valve closely to make sure there is no leaking. If water continues to seep from the valve if when it’s shut off, you will need to shut off the water to the house (at the main shutoff valve) and replace the fixture shutoff valve.
-
Remove the Drain Trap
Set a bucket under the P-trap assembly under the sink to catch any standing water that spills out when you disconnect the trap. The trap assembly has three parts: a straight tailpiece section connected to the drain pipe extending down from the sink; a U-shaped trap bend; and a straight trap arm with an elbow, leading to the branch drain pipe in the wall.
Remove the P-trap by loosening the two outermost slip nuts—the one on the sink tailpiece and the one at the wall end of the trap arm. If the pipes are plastic, you may be able to loosen the nuts by hand. Otherwise, use channel-lock pliers. Turn the nuts counterclockwise to loosen them. Slide the nuts away from the threaded ends of the pipes, then carefully remove the trap assembly. Dump the water in the P-trap into the bucket.
Stuff a rag into the open pipe leading into the wall to seal it off completely. This prevents sewer gas from flowing into the room.
-
Remove the Wall Mirror
Remove the vanity mirror, if desired. This is a good idea when the mirror rests on the vanity countertop or backsplash, as it is easy to break the mirror when removing the cabinet. However, if the mirror is glued to the wall, it’s best to leave it in place, unless you plan to replace the mirror.
-
Cut the Caulk Joints
Use a sharp utility knife to cut through any caulk where the vanity top meets the wall and along all edges between the countertop and the cabinet. Also, cut through any caulk where the cabinet meets the wall.
-
Remove the Vanity Top
Remove the vanity countertop; usually, it is easiest to leave the faucet in place (you can remove it later if desired).
Look underneath the vanity top to see if there are clips or brackets that hold the countertop unit to the vanity cabinet. If so, unscrew and remove these brackets. Lift up the front edge of the countertop. If it doesn’t separate from the cabinet, it may be glued to the cabinet edges. You can try to pry up the countertop or just leave it in place and remove it along with the entire cabinet (next step).
Pull the countertop up from the cabinet and away from the wall, being careful not to damage the wall surfaces. It’s best to remove the countertop, sink, and faucet from the bathroom entirely to free up space for maneuvering the vanity cabinet.
-
Remove the Vanity Cabinet
Remove any trim where the cabinet meets the walls, if applicable. Check inside the cabinet to determine how and where it is attached to the wall; most are fastened with a few screws driven through a mounting strip and into wall studs. It’s also possible that the cabinet will be anchored to the floor with screws or nails driven through nailing blocks at the bottom of the cabinet. Remove all screws with a drill or screwdriver.
If the cabinet is attached with nails, carefully pry it away from the wall with a flat pry bar. Place a wood block between the pry bar and the wall, and lever against the block. This is important to prevent damaging the wall.
Pull the cabinet away from the wall. If the cabinet has a back panel with holes that the plumbing valves fit through, be careful not to damage (or turn on) the valves as you move the cabinet.
-
Complete the Project
Clean up the wall by removing any remaining caulk with a putty knife or scraper. If the new cabinet is smaller or shorter than the old one, plan to patch and paint the wall and/or floor, as needed, before installing the new vanity.
Read the full article here


